
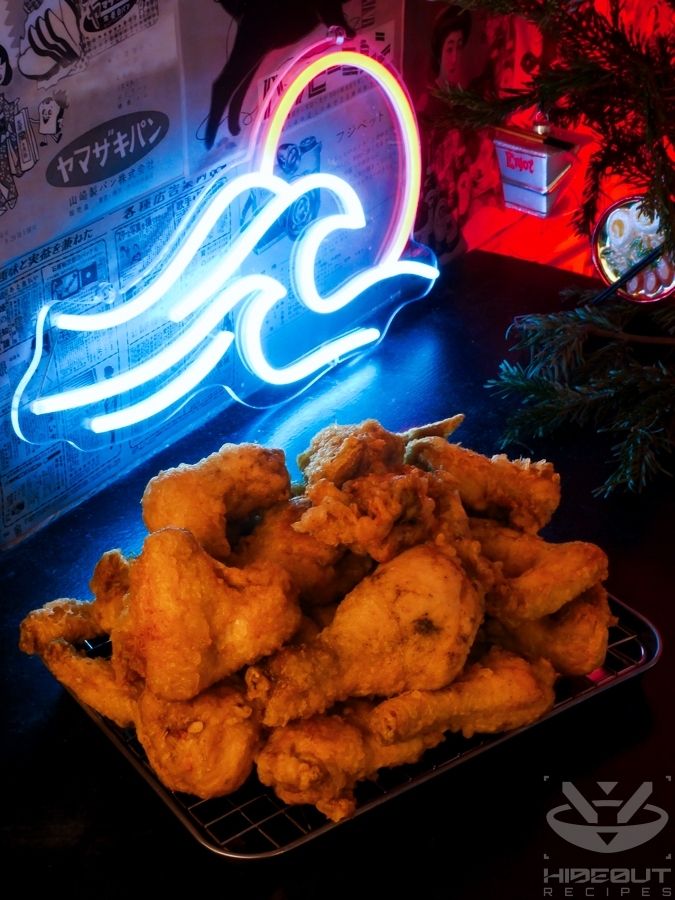
Hands down the crunchiest, juiciest, most delicious chicken in the world. You won’t want to have fried chicken any other way ever again.
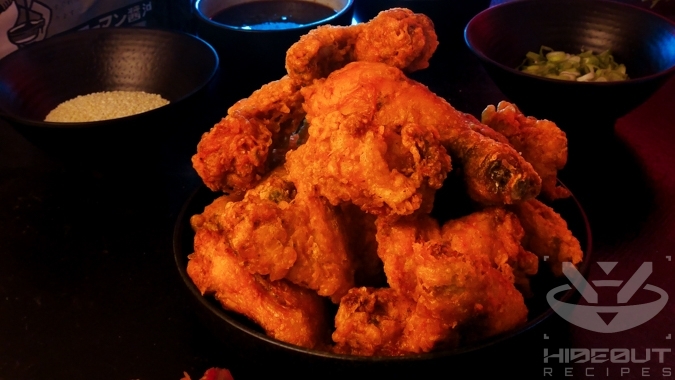
If the “K” ain’t for “Korean”, you can keep that chicken.
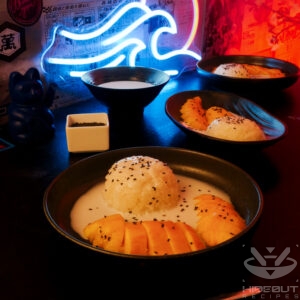
A Patron
Merry Crispmas! You might be wondering why I chose Korean Fried Chicken out of all the possible holiday dishes out there. Well, I took inspiration from the Japanese tradition of eating a bunch of KFC for Christmas. Except, you know, I made it the good KFC.
Measure twice, cook once

This will look like a lot of chicken per person, but since there are no side dishes (besides maybe some banchan), and because it’s so delicious, you’ll be surprised at how much you’re going to end up eating.
The measurements for the batter are generous relative to the chicken, you’re likely going to have some left. I figured this was better than skimping and ending up having to make more. The sauce servings are also rather big; if you make two sauces with the original measurements, it should be more than enough for the indicated amount of chicken. If making one or three, adjust their serving amounts. Then again, leftover sauce can be stored in the fridge for a few days, and provides an excellent excuse to make more fried chicken very soon.
Fry, fry again
I’m not going to lie to you: Like most homemade deep-fried dishes, Korean Fried Chicken takes quite a while to prepare if you don’t have an industrial deep fryer at home. However, I promise that the taste will be worth every second. I recommend doing the dry rub the night before, and getting started with the deep-frying at least 90 minutes before your intended serving time. Get the sauces ready some time in-between.
Why 90 minutes? Let’s do some quick math, assuming you are making four servings in a mid-sized pot. From my experience, you need to deep-fry the chicken in 6 to 7 batches the first time (6 minutes each), and in 3 to 4 batches the second time (5 minutes each). That’s an hour of just deep-frying, plus extra time between batches for bringing the oil back to temperature and cleaning it, as well as patting the chicken dry. If things go relatively smoothly, this whole process takes about an hour and a half.
Do not rush the deep-frying by overcrowding the pot. The oil will cool down too much, and your chicken pieces will stick together. During the first round of frying, they should all swim freely in the oil without touching each other or the sides of the pot more than a little bit. In the second go-around, for the double-fry, the batter won’t break apart easily anymore, and you can fry more pieces at once. Frying a second time is mandatory; in the picture above, you can see the chicken comes out somewhat golden after the first go-around, but not nearly as crunchy as the end result.
Don’t be sloppy about drying the chicken either. I recommend the following: After frying, shake off the oil thoroughly, then place the chicken pieces on paper towels for about a minute, flipping them around once to draw out the oil from both sides. Next, transfer them to a wire rack for storage. Don’t let the chicken rest on paper towels, since it will get soggy after prolonged contact.
A stroke of genius
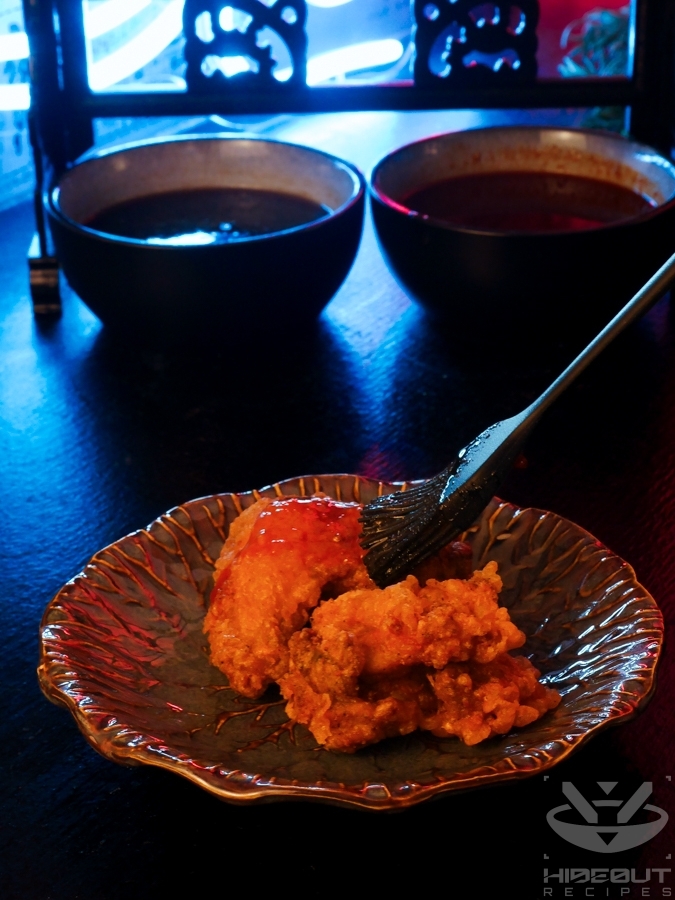
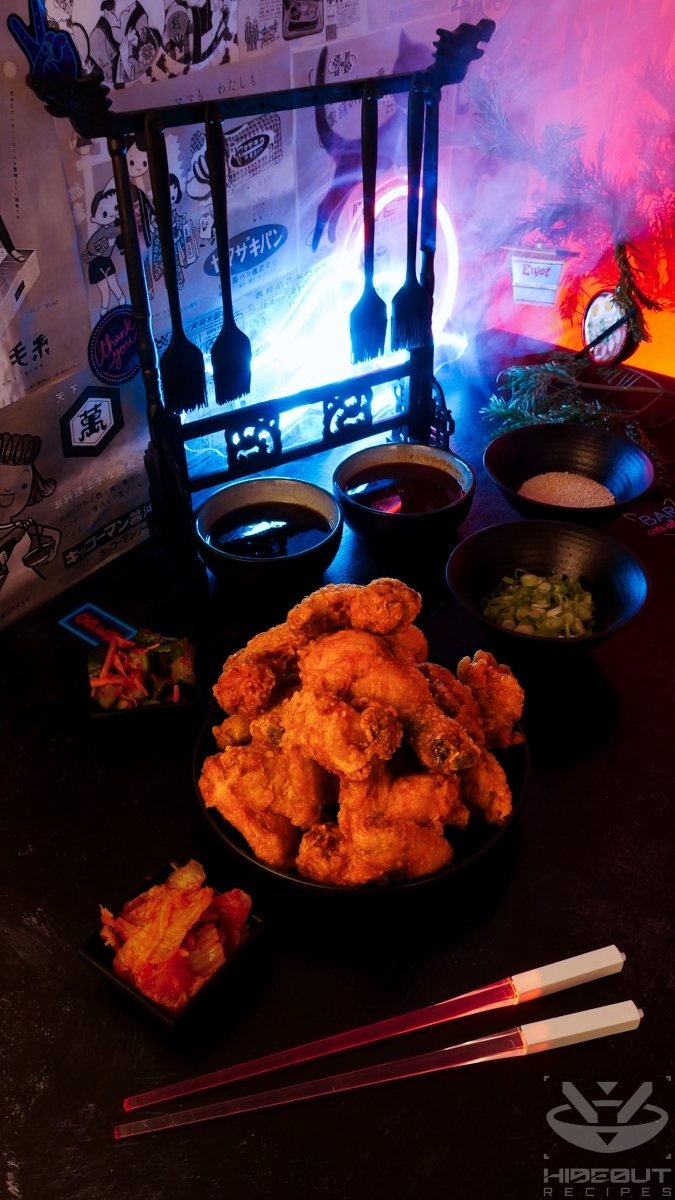
Full disclosure, I stole the idea of the hanging sauce brushes straight from an amazing fried chicken place in Seoul called Kyochon Pilbang. If you find it easier, you can toss the fried chicken straight in the sauce and then serve it. With the double-fry, it will stay crunchy for hours even when drenched in sauce. However, I’ve found that the experience of brushing on your preferred sauce at the table is a really fun gimmick. Plus, it keeps the leftover sauce a little cleaner when compared to dipping the chicken straight in.
All three sauce recipes are at the bottom of the page!
On the ingredients
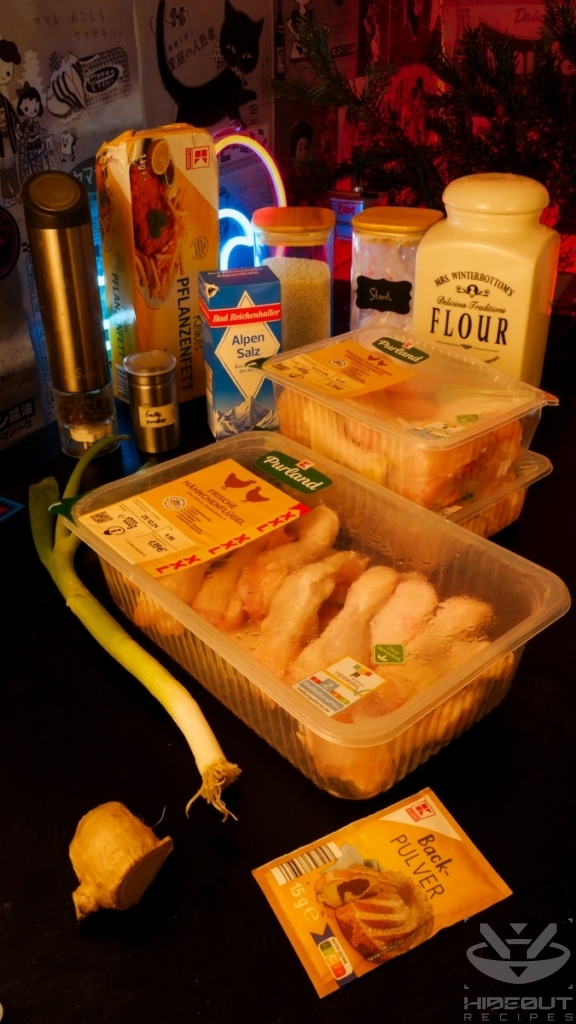
As for the chicken pieces, I like to buy a mix of wings, drumsticks, and (my favorite) boneless chicken thighs. Drumsticks are the thickest and juiciest, so they often get soggy faster than the other two. To mitigate that, you can make dedicated drumstick batches and deep-fry them a minute longer each time. The thighs should be cut in half before dry brining. Do not remove any of the skin, as it is essential to a crispy end result, and to keeping the meat juicy all the way. Don’t use chicken breast.
When it comes to banchan (pickled Korean side dishes), I recommend fresher ones that contrast the fatty food. Pickled radish is often served along fried chicken in Korea, but cucumber kimchi is also a good fit. You can also get creative with the toppings; besides sesame and scallions, crushed peanuts and cheese powder are popular choices, too. And finally, when it comes to drinks, nothing goes with fried chicken quite like a cool beer.
Recipe credit
Like most of my recipes, I started this one out by basing it largely on an existing one, specifically the Korean Fried Chicken recipe by Korean Bapsang. I’ve since practiced it many times, made changes to the ingredients and steps (sometimes very few, sometimes many), and written up as much additional advice as I could based on my own experience.
As mentioned above, the hanging brushes idea is taken from Kyochon Pilbang. I highly recommend it if you’re looking for fried chicken in Seoul; in Busan, I really liked Namsun Chicken. Nene Chicken is a very solid international chain, at least based on the locations I’ve been to in Tokyo’s Koreatown.

Korean Fried Chicken
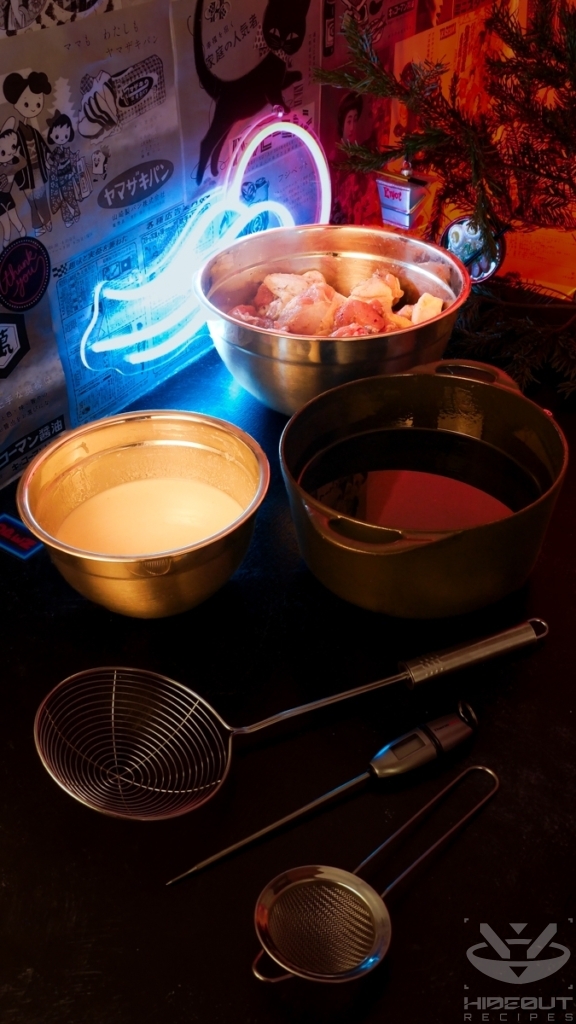
Equipment
- 1 mid-sized pot, pan, or wok for deep-frying ideally bottom-heavy, e.g. cast iron
- 1 Thermometer for the oil
- 1 spider skimmer or metal tongs for handling the chicken
- 1 fine-mesh metal skimmer for cleaning the oil
- 1 food brush for each sauce optional
- 1 large wire rack with drip pan optional
Ingredients
For the chicken
- 2 kg mixed chicken parts with skin drumsticks, wings, boneless thighs
- 2 tsp ginger
- 1.5 tsp table salt for the dry-rub
- 0.5 tsp black pepper for the dry-rub
- 1 block firm vegetable fat or any oil suited for deep-frying
For the batter
- 120 g all-purpose flour
- 1 tsp baking powder
- 0.5 tsp salt
- 1 tsp garlic powder or onion powder
- 100 g potato starch or corn starch
- 350 ml water
Garnish & sides (optional)
- some white sesame
- 1 stalk scallion
- 1-3 sauces of your choice see separate recipes!
- any banchan of your choice e.g. pickled radish, cucumber kimchi
Instructions
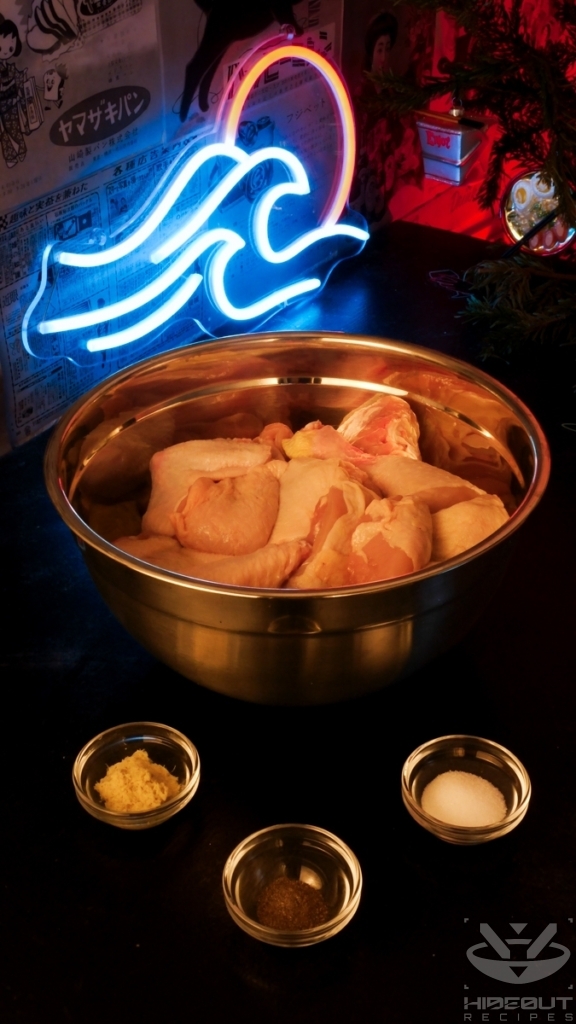
Dry brine the chicken
- Gather all your chicken pieces in a large bowl. If using boneless chicken thighs, cut them in half first.
- Peel and finely mince or grate the piece of ginger.
- Thoroughly mix the ginger, table salt, and pepper into the chicken.
- Store in the fridge for 2 to (ideally) 24 hours.
Prepare sides & garnish
- In the meantime, make the desired sauce(s) according to the recipe(s) below.
- Prepare any banchan you like. I recommend something fresh and/or acidic like pickled radish or cucumber kimchi. Classic cabbage kimchi always works, of course.
- Thinly slice the scallion for serving.
Prepare deep-frying
- Mix the batter ingredients in a mid-sized bowl until there are no more lumps.
- Heat up the vegetable fat in a heavy mid-sized pot (e.g. cast-iron) over high heat. Start measuring the temperature regularly.
- Take the chicken out of the fridge.
- Get out one plate as well as a wire rack or other surface were your oily chicken can dry later.
Fry in batches
- Once the oil reaches 160° C, begin frying your first batch as follows.
- Dip each chicken piece in the batter and then briefly let excess batter drip off.
- Carefully lower the pieces into the oil individually. Do this in quick succession so they're fried for roughly the same amount of time.
- Keep the batch small enough to ensure the pieces don't touch each other or the sides of the pot. My pot (see pictures) fits about 3 pieces.
- Don't touch the chicken for the first minute to avoid breaking the batter. It's usually enough to flip each piece once half-way through. This ensures even browning, as the heat is higher underneath.
- Measure the temperature often and keep it between 160° C and 165° C to the best of your ability. The oil cools down when chicken is added, but if you keep the heat high at all times, it may overshoot the desired temperature.
- After 6 minutes, your chicken should be lightly golden and fairly crispy.
- Take out each piece and carefully shake off excess oil for a few seconds.
- Store the pieces on a wire rack and/or on paper towels. Flip them once before the second fry to get the oil out from all sides.
- Using a fine mesh strainer, remove any bits of batter left behind in the oil.
- Bring the oil to 160° C again and repeat with the remaining batches of chicken.
Double-fry!
- If you want to keep the finished batches warm as you fry up the rest, heat up your oven to 100° C and place a baking sheet on a wire rack inside.
- Clean the oil once more and bring it up to 175° C.
- Add the fried chicken back into the oil batch by batch. You can now make larger batches, as it's okay for the pieces to touch each other and the pan.
- Deep-fry each batch for 5 minutes, keeping the temperature between 175° and 180°.
- Thoroughly shake off excess oil and again place your chicken on a wire rack or paper towels for drying. Then transfer to the oven if desired.To maximize crunchiness, make sure to store the chicken in a single layer, and do not cover it with anything.
Serve!
- You can toss the chicken in the sauce(s) or brush them with it.
- Afterwards, sprinkle with sesame and sliced scallion.
- Serve with banchan. Enjoy!
3 Sauces For Korean Fried Chicken
Ingredients
Red spicy sauce
- 0.5 tbsp soy sauce
- 1 tbsp cooking wine e.g. Shaoxing wine or mirin
- 1 tbsp gochujang
- 1 tbsp hot sauce e.g. sriracha
- 1 tbsp sugar
- 1 tbsp honey
- 0.5 tbsp minced garlic
- 2 tbsp water
Soy garlic sauce
- 1 tbsp soy sauce
- 1 tbsp cooking wine e.g. Shaoxing wine or mirin
- 1 tbsp sugar
- 1 tbsp honey
- 0.5 tbsp minced garlic
- 0.5 tsp white vinegar
- 0.5 tsp oyster sauce
- 2 tbsp water
Honey butter sauce
- 4 tbsp butter
- 2 tsp minced garlic
- 50 g white sugar
- 2 tsp soy sauce
- 2 tsp honey
Instructions
- I recommend making one default serving of sauce per 1-2 servings of chicken (provided that you are following my Korean Fried Chicken recipe). If making multiple sauces, scale down the amount accordingly.
- The steps for each sauce are almost identical.
Red spicy sauce / Soy garlic sauce
- Mix the ingredients of your chosen sauce together in a bowl.
- Transfer to a pot and heat up over low to medium heat.
- Leave to simmer for 3-4 minutes, then set aside and leave to cool.
Honey butter sauce
- Add the butter to a pot over low to medium heat.
- Once melted, add the garlic and stir until fragrant.
- Add soy sauce and sugar until the latter is fully dissolved.
- Add honey and stir until well-integrated.
- Take off the stove and let cool.
1 Comment
The ginger for the chicken rub, that’s dry ginger powder, correct?
I’m looking forward to trying this one. I do quite a bit of deep frying, but I’ve never successfully made fried chicken before. Double-frying sounds like it would really do the trick though!