
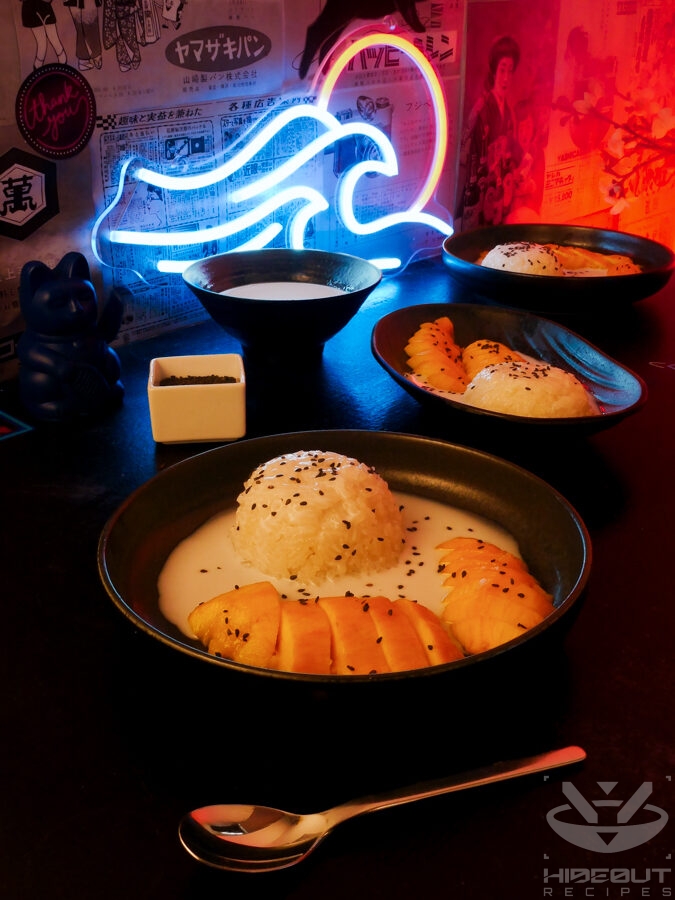
Just steamed rice and mango in a thick and sweet coconut sauce, this dessert is the definition of simple, yet effective. Steam the rice, mix the sauce, cut the mango, and you have yourself a banger.
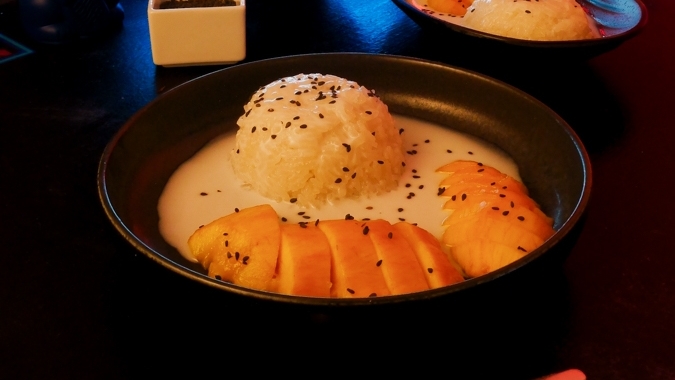
Just as sticky and sweet as the countertops in this place, but doesn’t make you sick.
The Chef
This is one of my favorite desserts in the world, and the very first one on this blog for that very reason. It’s always sure to impress as long as you remember that the rice needs to soak overnight.
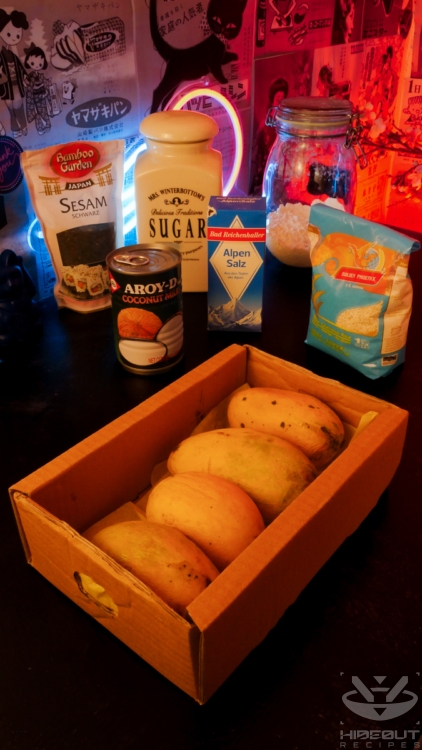
Man, go buy the good stuff
Mangoes vary a lot across the world. In the West, they are usually larger and much less flavorful than the ones found in Southeast Asia. If you have the opportunity to get smaller, sweeter ones, you absolutely should even if they are more expensive. In Europe, you can sometimes get Pakistani mangoes (as seen in the pictures), which are excellent. This recipe assumes you are using small mangoes; using larger ones, half a mango is usually enough per person.
Slice her up
To get the most mango out of your mango, you need to cut out the pit. You can tell where it is by the “seam” that runs alongside the… long side. Place the mango in your hand with the stem facing towards you, and the pit horizontally aligned with the floor. Now using a sharp knife, slice off the top part (away from you!) by letting the blade slide along the top of the pit. It will yield a somewhat curved piece of meat. Set it aside, flip the mango over, and repeat the process. Slice off the other half of mango meat, and you should be left with a very slim disk containing just the pit and some pulp on the sides.
Usually, the Mango Sticky Rice is served without the mango’s skin. This recipe also calls for peeling it, which you should do before cutting out the pit. However, there is also a nice way to present and eat it with the skin still on: Cut the pit out as described above, then lie the mango halves down with the peel facing downwards, and the pulp surface facing towards you. Now, make straight cuts along the mango from left to right and then from top to bottom, creating a mesh of ~1–2 cm thick cubes still attached to the skin. Be careful to cut all the way down to the skin, but do not pierce through it. At the end, make the cubes protrude outward by bending the skin back. It will stay that way on its own, and should look a bit like a mango hedgehog with square spikes.
As for the peeled variation, there are many different ways to cut it for the final presentation. I stuck with simple slices, but I don’t want to keep you from living your dreams of elaborate mango sculptures. I made an intricate mango rose once, but I can assure you it tasted the same.
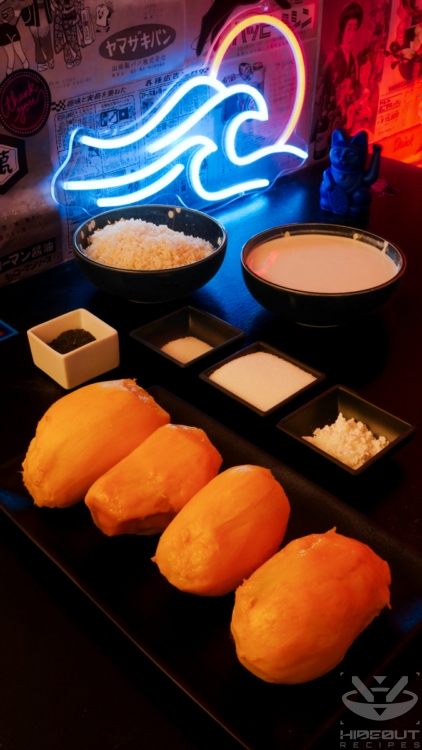
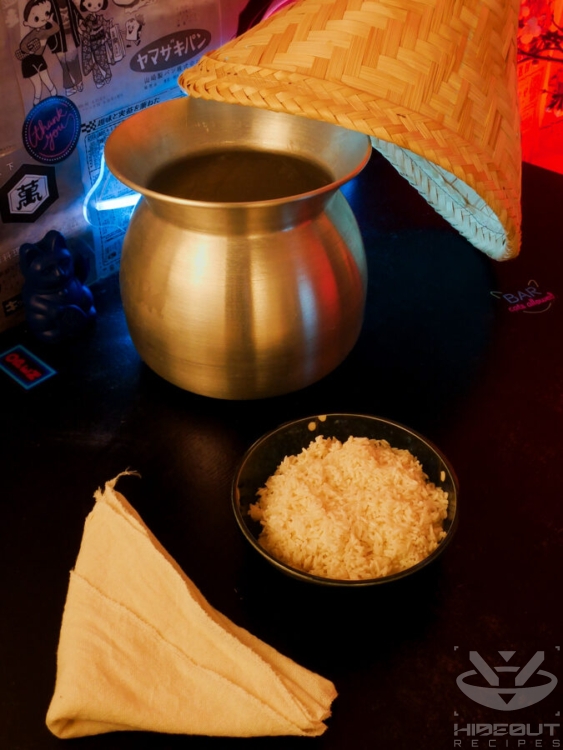
All ingredients unprocessed, processed & after steaming rice and making the sauce
Saucy disagreement
With half a teaspoon of salt as stated in the recipe, the sauce comes out noticeably sweet and salty. If you prefer the salt to merely provide a subtle contrast, go for a quarter teaspoon instead. You can also make it saltier to contrast the mango more; I’ve had a variation in Bangkok that was much more salty than sweet, but I didn’t like it much.
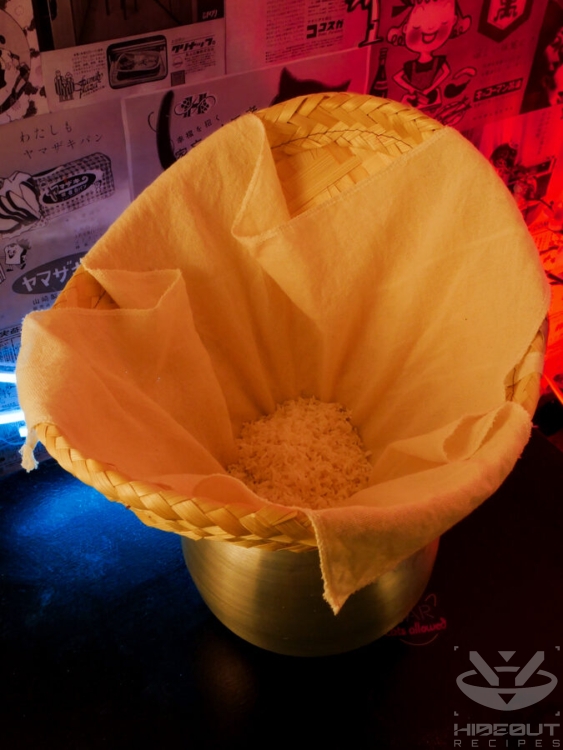
Steamy action
I used a Thai sticky rice steamer basket, but you can absolutely use any other steamer that is compatible with rice, such as the more widespread cylindrical bamboo steamer baskets. To prevent your rice from falling through the holes or sticking to the bamboo, you need to add a layer with a very fine mesh. Personally, I use a cotton cloth (or cheesecloth) as pictured.
Don’t get a rice out of me
Use run-of-the-mill granulated white sugar to preserve the color of the rice. And speaking of rice, it is imperative that you get glutinous rice. It will say so on the package, and you can easily recognize it from its milky white color. If you use any other rice, straight to jail. Do not pass go. Do not collect 200 dollars.
Some ingredients can be hard to find where you live, so I adapted the recipe. For one, I actually prefer toasted mung beans over black sesame for the topping. They are very commonly used in Thailand, but I haven’t found them at my Asian grocery store. For the same reason, I completely left out two other ingredients: a pandan leaf, which lends a vanilla-like scent, and butterfly pea, a flower that is often used to dye rice (and sometimes noodles) blue. The latter is only cosmetic and the most optional, but if you can get pandan, it really elevates the flavor. You can add both of these ingredients while cooking the sauce to give off their flavor and color respectively. Take them out afterwards as they should not be eaten.
Recipe credit
Like most of my recipes, I started this one out by basing it largely on an existing one, or in this case two: Mango Sticky Rice by Omnivore’s Cookbook, and the cooking class recipe from House Of Taste. I’ve since practiced it many times, made changes to the ingredients and steps (sometimes very few, sometimes many), and written up as much additional advice as I could based on my own experience.

Mango Sticky Rice
Equipment
- 1 Thai sticky rice steamer or any steamer basket usable for rice
- 1 cotton cloth or similar so the rice doesn't fall in the water
Ingredients
- 4 small mangoes or 2-3 larger ones
- 200 g glutinous Thai rice
- 400 ml coconut milk usually 1 can
- 50 g white sugar
- 2 g salt
- 60 ml water optional
- 2 tsp corn starch or tapioca starch optional
- some black sesame seeds optional
Instructions
Soak the rice (night before!)
- Rinse the rice briefly once in cold water.
- Put it into a bowl and add about twice as much water in volume.
- Store the bowl in the fridge overnight.
Steam the rice
- Pour out the excess water from the rice bowl.
- Add the rice to a steamer of your choice (see comments above).
- Add water to the pot under the steamer basket and set to high heat.
- Once it's boiling and begins to steam the rice, turn the heat down to medium. Continue to steam the rice for 20-25 minutes.
- When it's just about done, you should try a grain or two to make sure there is no hard center left inside.But until that happens, get the sauce and mangoes ready!
Make the sauce
- Combine the coconut milk, sugar, and salt in a saucepan.
- Cook over medium-low heat until the sugar is melted. Do not bring to a boil!
- If you like the sauce a little thicker (or your coconut milk is very thin), make a slurry by stirring the corn starch into the water, and adding it to the saucepan.
- Turn off the heat and set the sauce aside.
Cut the mangoes
- Peel the mangoes. There are many methods for this online, but I recommend using a simple potato peeler.
- Cut into the flesh past the flat pit on both sides so you have two large slices plus the pit with some additional pulp on it. Detailed instructions in the notes above.(For the prettiest result, only serve the two slices. Use the pulp on the pit some other time, or maybe just snack it right now.)
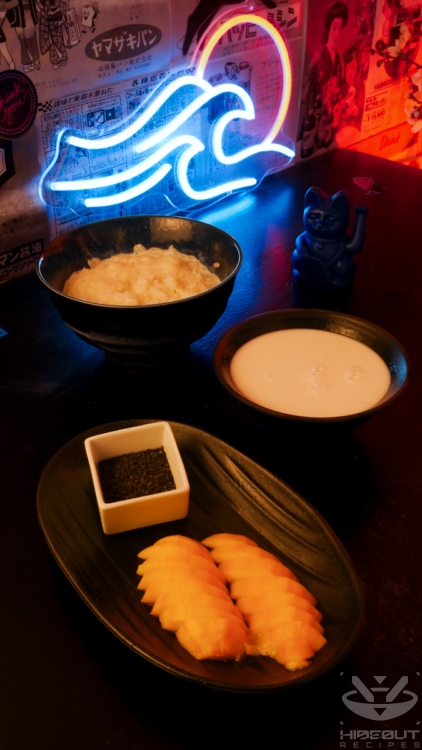
- Cut the two large pieces of flesh the short way into 1-2 cm wide strips (see photos of results).
Assemble
- Remove the steamer from the heat and put all the rice into a mid-sized bowl.
- Add 250ml (1 cup) of the sauce to the rice and mix well so the rice absorbs the sauce. Let cool until the rice is lukewarm.
- Meanwhile, distribute the mango slices to small plates for serving.
- If you want, briefly toast the black sesame seeds in a small pan (even though they are pre-toasted) to get them extra fragrant.
- Distribute the lukewarm rice to the plates next to the mangoes.
- Pour some more sauce over the rice on the plates. Put the rest on the table for self-service.
- Sprinkle each plate with sesame seeds. Enjoy!

2 Comments
Not everyone has mochigome (glutinous rice) lying around, but that’s a shame. Soak it overnight and steam it like this for an amazing textural experience.
Follow the rest of the recipe for a low-effort, delicious rice pudding. The more tangy the mango, the better. This is a dessert portion, so you may want to double or triple it per appetite.
Thank you for your comment and rating! And for cooking so many of my recipes, it genuinely means a lot.