
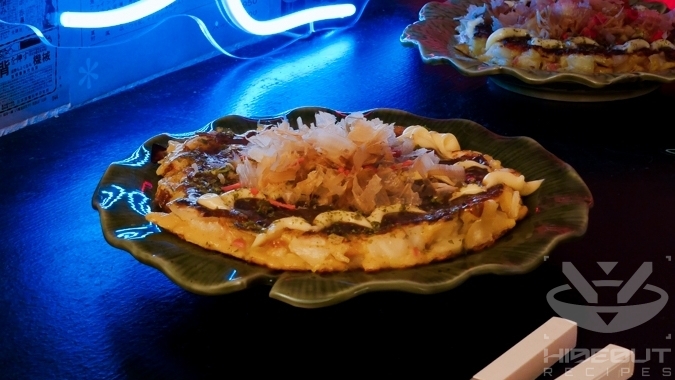
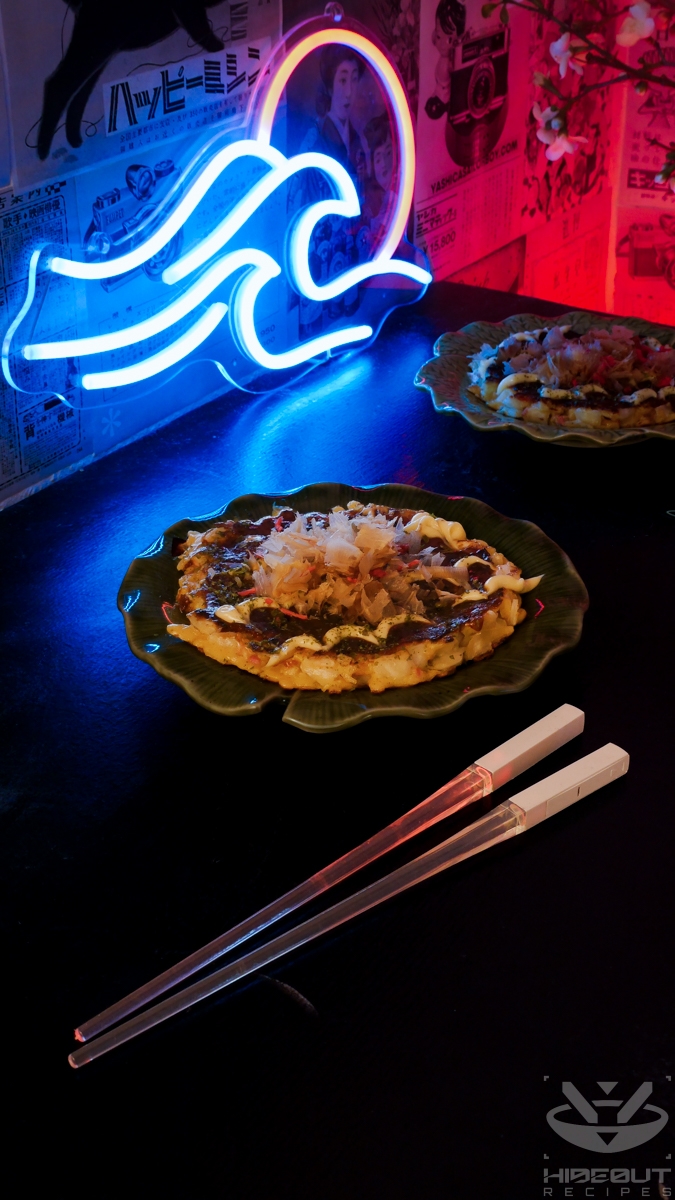
Thick savory pancakes with cabbage, bacon, and various flexible toppings!
Eggs? In this okonomi?
The Chef

Grill, baby, grill
This recipe works best on an electric grill with a stainless steel surface. It allows you to easily control the heat, maintain the shape of the okonomiyaki using metal spatulas (pictured), and make at least two at a time even on a moderately-sized grill. You can also make them in a regular pan on an electric stove, or preferably in two pans to speed up the process.
Speaking of the time it takes to fry the okonomiyaki, I struggled with this recipe the first few times I made it because the batter just would not cook all the way through, remaining wet and soggy for what felt like 30+ minutes per pancake. I was literally about to give up on the recipe, but then I added the step of dehydrating the cabbage, which solved the problem immediately. I haven’t seen this step in other recipes online, and I frankly don’t know how they work without it.
Better batter?
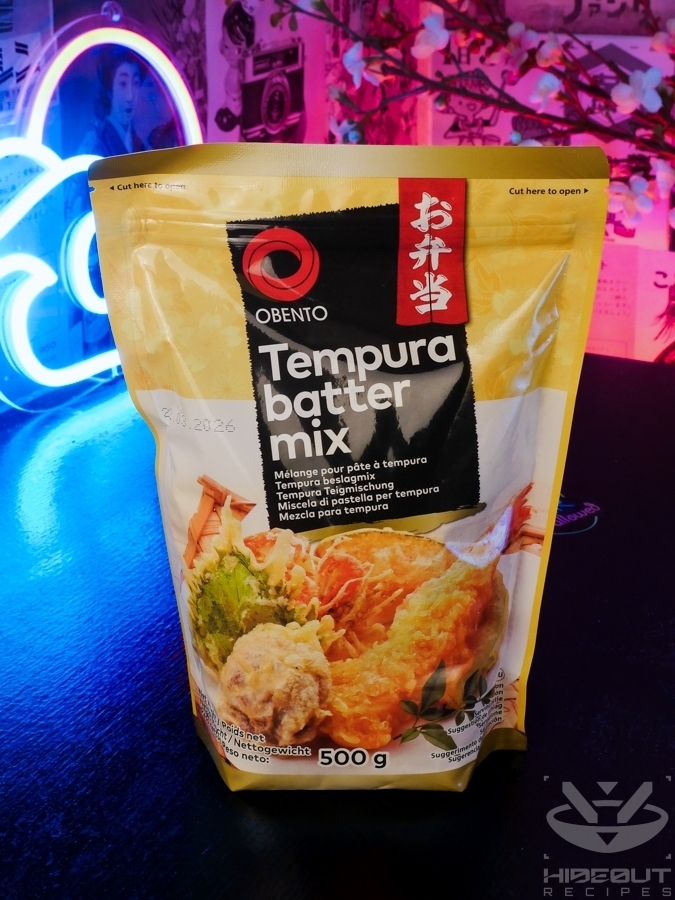
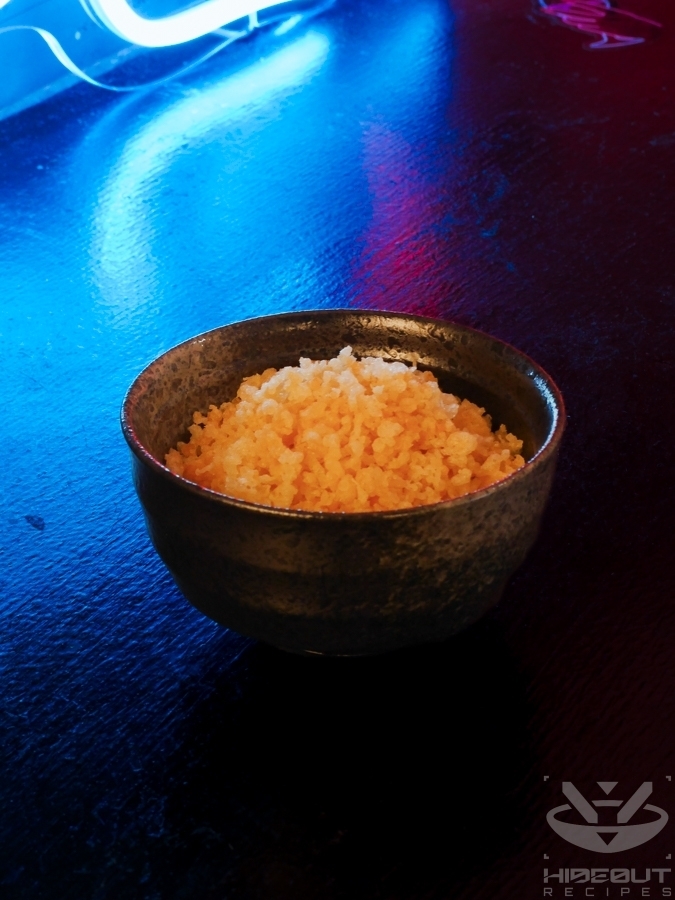
Tenkasu (tempura scraps) is one of those ingredients I’ve never seen at a store around here. It’s supposed to be available pre-packaged in bags, and if you can find it, go for it. However, if you can’t, I frankly don’t think it’s worth the hassle to make it at home. Even though it’s apparently a classic ingredient (in Takoyaki as well), serving to make the pancake fluffier and enrich its taste, I can’t say it makes that much of a difference. If you do want to make your own, thoroughly mix 30g of tempura batter mix with 60ml of cold water. Heat up neutral oil in a pan or saucepan (at least 1cm deep) to 180°C. Dip your chopsticks in the batter and drip it into the oil. Fry for half a minute, fish out the fried dough, and shake off excess oil. Store on some paper towels. Rinse and repeat until all the dough is fried. This should yield around 50g of tenkasu.
Nagaimo (aka Japanese mountain yam or Chinese yam) helps with the consistency and integrity of the pancakes. It’s very slimy and it lightly irritates the skin, so be careful when grating it. I find this one more important than tenkasu and don’t recommend skipping it. If you can’t find any, consider adding a little more dashi and/or egg, as the nagaimo adds a lot of moisture.
As-you-like-yaki

The toppings I listed are classics, and I highly recommend them all. However, you can remove, swap, add anything you like – “okonomi” means “as you like” after all. The same goes for the batter, by the way. Seafood is a popular addition. I added octopus pieces in the past, for example.
Of course, it’s also easy to turn this recipe vegetarian: Just use vegetarian dashi for the batter, and leave out the bacon and katsuobushi.
Recipe credit
Like most of my recipes, I started this one out by basing it largely on an existing one, specifically the Just One Cookbook Okonomiyaki recipe. I’ve since practiced it many times, made changes to the ingredients and steps (sometimes very few, sometimes many), and written up as much additional advice as I could based on my own experience. I learned the additional step of draining water from the cabbage using salt at a street food cooking class in Hamburg. Finally, I want to shout out Moegi in Osaka, where I first had Okonomiyaki in its place of origin and truly discovered its variety.
Okonomiyaki
Equipment
- 1 electric grill & metal spatulas optional; regular pan also works
- 1 grater
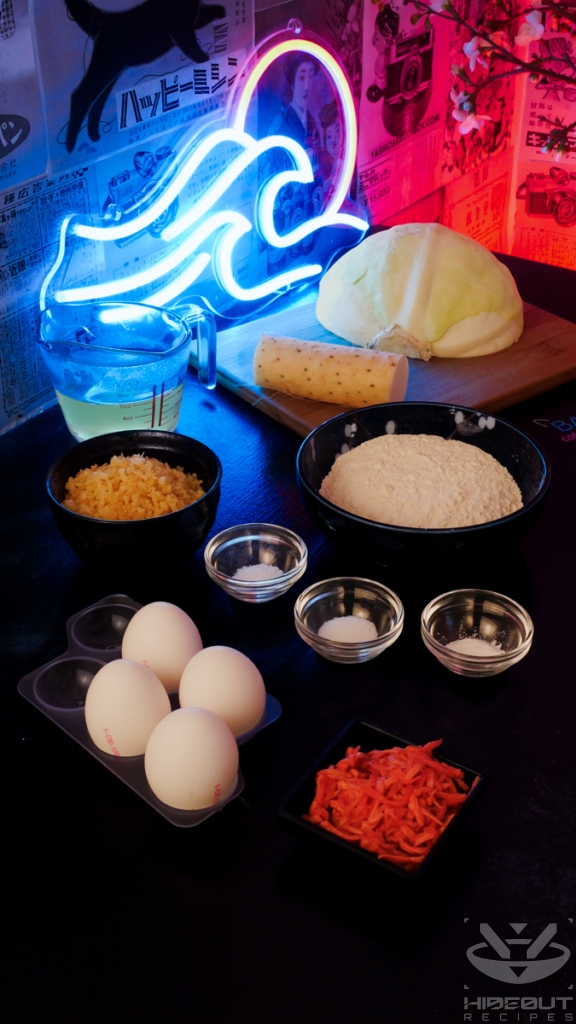
Ingredients
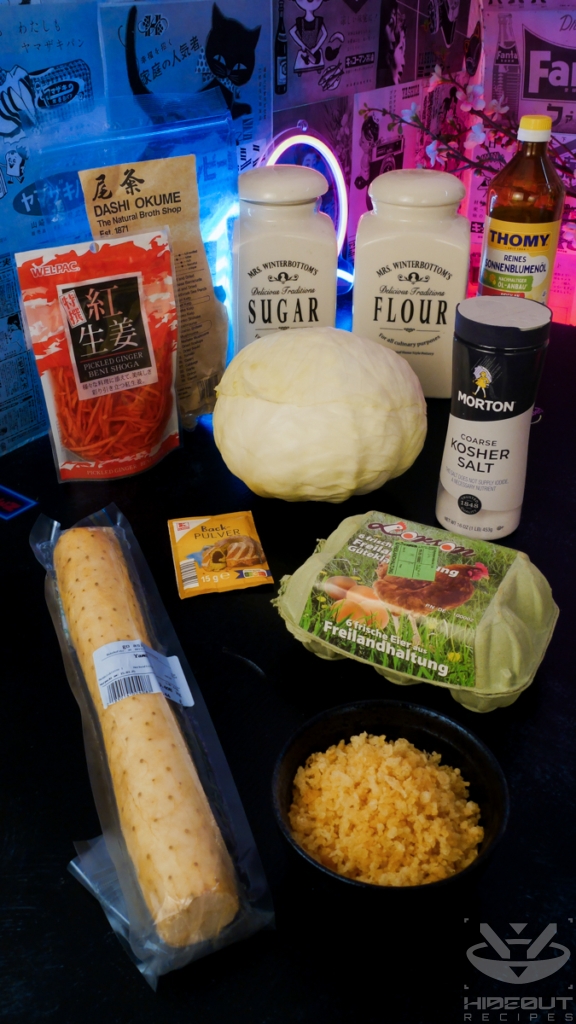
For the batter (1st stage)
- 120 g all-purpose flour
- 0.25 tsp salt
- 0.25 tsp white sugar
- 0.25 tsp baking powder
- 160 g nagaimo aka Chinese yam
- 180 ml dashi stock e.g. using instant powder
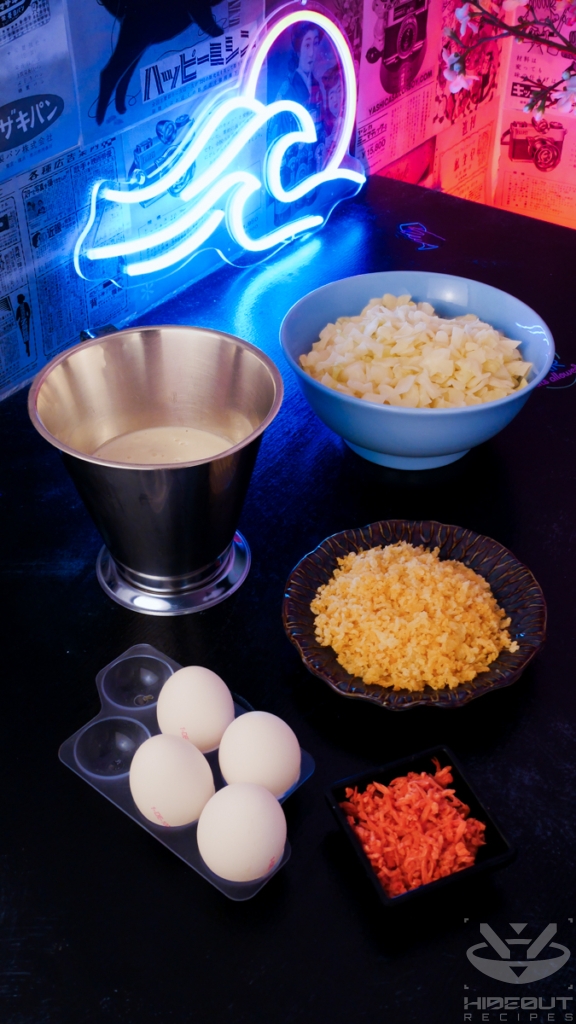
For the batter (2nd stage)
- 0.5 head green cabbage aka white cabbage
- 1 tbsp coarse salt
- 50 g beni shoga
- 4 eggs
- 50 g tenkasu optional
- some neutral oil for frying / grilling
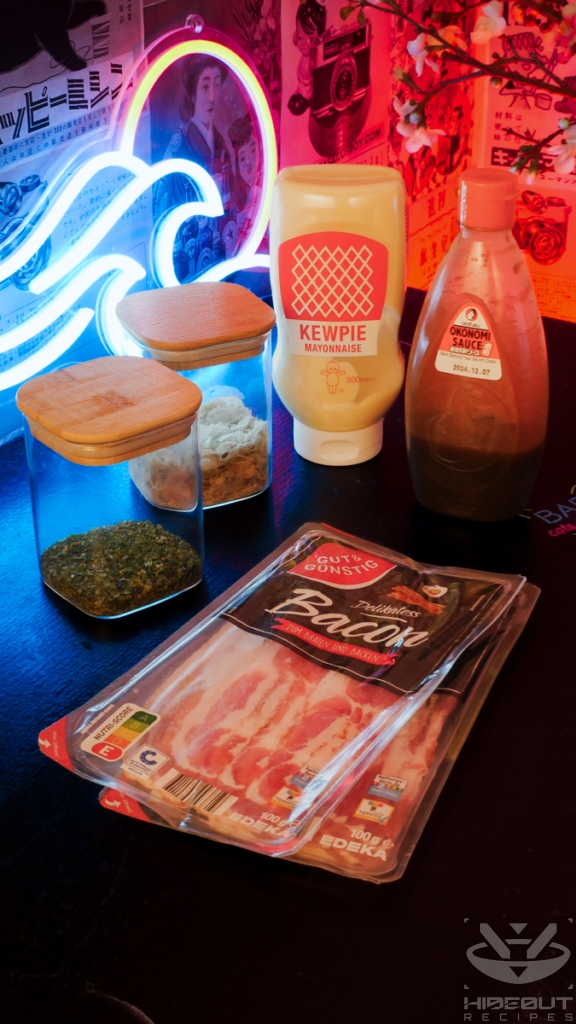
Toppings (recommendations)
- 150 g bacon slices
- some okonomi sauce
- some Kewpie mayonnaise
- some aonori
- some katsuobushi
- some beni shoga
Instructions
Prepare the batter (1st stage)
- Make the dashi broth according to package instructions of your instant powder.
- Peel the nagaimo and grate it using a ceramic or cheese grater. I recommend using a glove or quickly washing your hands after, as it irritates the skin.
- Combine flour, salt, sugar, and baking powder in a large bowl.
- Add in the grated nagaimo and dashi, mix thoroughly.
- Store it in the fridge.
- Wash the cabbage, then slice into pieces of 1-2cm width and length. To achieve this, remove the tough stem, cut into slices and then slice them again lengthwise.
- In a large bowl, thoroughly mix the coarse salt into the cabbage.
- Let the batter and cabbage rest for at least one hour.
Drain the cabbage
- After an hour or more, pour out the extracted water from the bowl of cabbage.
- Place the cabbage in the middle of a large, clean kitchen towel.
- Fold up the ends of the towel around the cabbage and twist over your sink.
- Squeeze out as much water as you can (but be careful not to rip the towel). Afterwards, the cabbage should weigh very roughly 500g.
Prepare the batter (2nd stage)
- Take the batter mix out of the fridge.
- Mix in the cabbage, beni shoga, tenkasu, and crack in four eggs. Stir thoroughly.
Make the okonomiyaki
- Have your toppings handy, as they will be added right at the end of this step.
- If using bacon, slice it into ~10cm long strips.
- Heat up some neutral oil in a frying pan over medium high heat or ideally on an electric grill at 200°C. A cast iron or stainless steel surface is best so you can use metal spatulas in the following steps.Note: If you have two pans or a large enough grill surface, you should make two at a time.
- Once the oil is hot, add one fourth of the batter to it and shape it into a round disk that is about 15cm in diameter and about 2 cm high. (Yes, they're pretty thick!)
- If using bacon, place some slices on top of each pancake. Make one layer of slices and another one on top of it at a 90° angle.
- Cook for about five minutes until golden brown on one side.
- Flip the pancake(s) over and cook for another five minutes.
- Throughout this whole process, regulate heat and add oil as needed to ensure even browning. Use spatulas occasionally to keep the round shape intact.
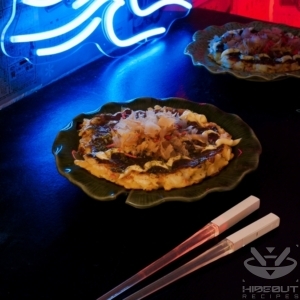
Add the toppings
- The following toppings are classic choices, and I highly recommend them. However, you can make your own variation. After all, "okonomi" means "as you like".
- Add a layer of okonomi sauce and spread it over the full surface so it forms an even layer, then zigzag some Kewpie mayo over it.
- Sprinkle some aonori on top, then katsuobushi and some extra beni shoga.
- Serve immediately. Enjoy!

1 Comment
Hell yeah! Okonomiyaki is classic food! I don’t talk the time to grate yam, so I just add a little flour, though I supposed I could grate a little potato. That might add enough starch, and it’s a great nutitive that pairs well with cabbage.