
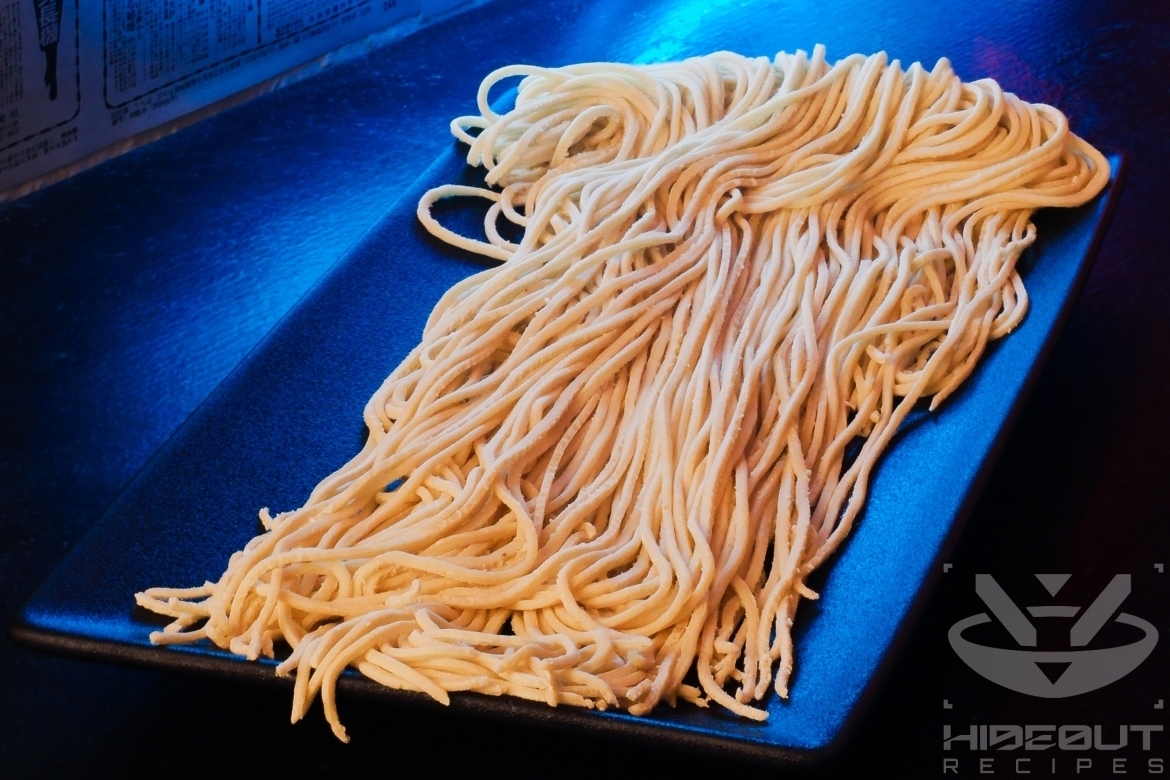
Fresh noodles for any type of ramen, guaranteed to taste 100 times better than their dried counterpart!
Is this even related to instant ramen?
A Patron
I’ve had a lot of ramen in my life, and nothing decides over the quality of a bowl quite like the noodles do. Whether dried or from the fridge, store-bought noodles do not hold a candle to a freshly made batch.
Like the Italians do
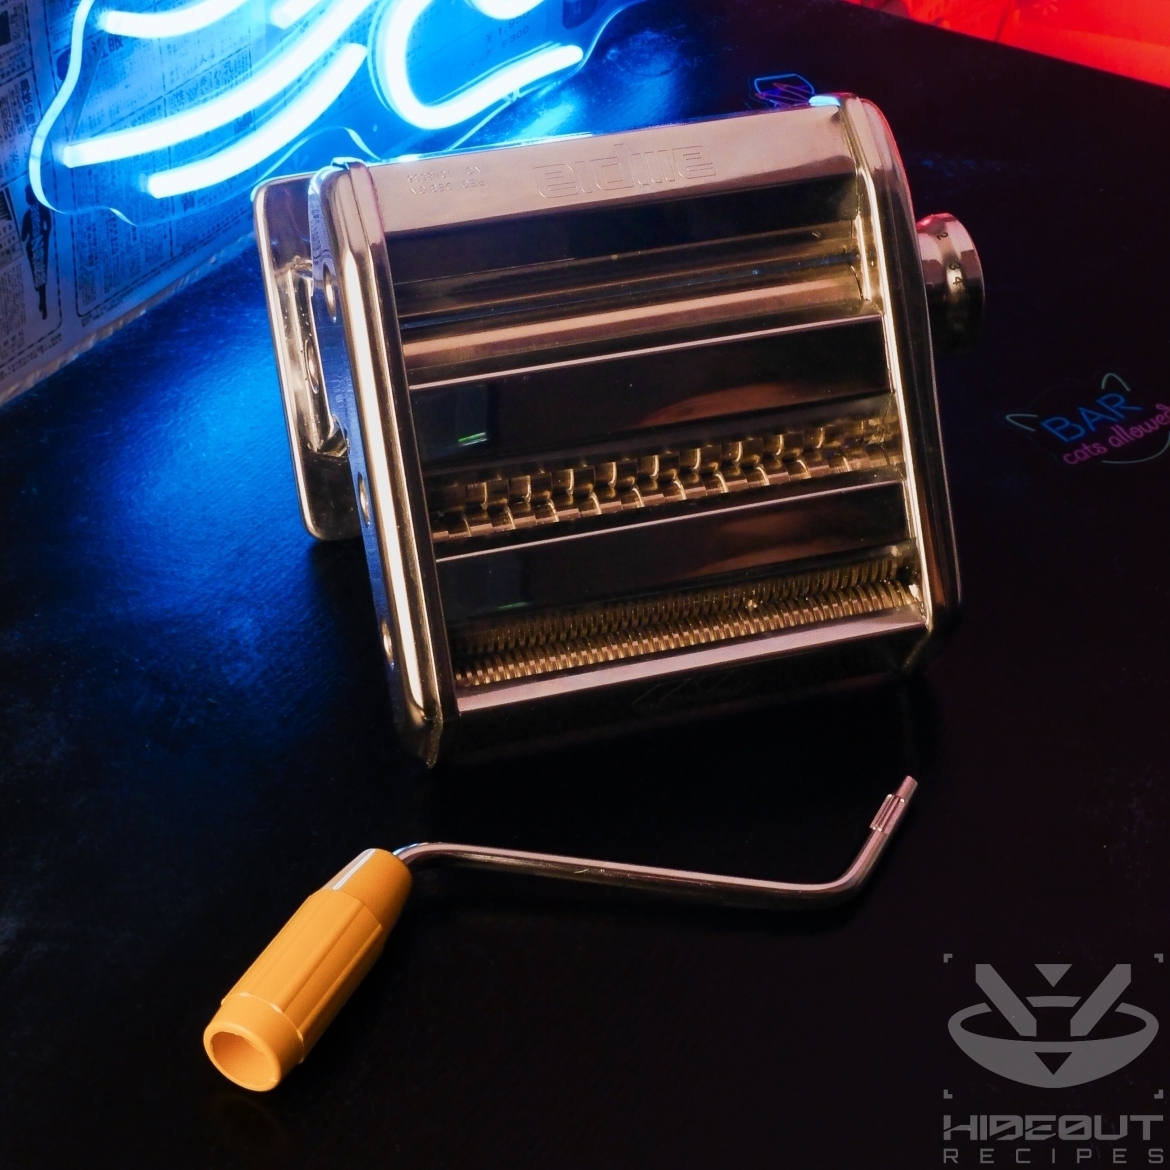
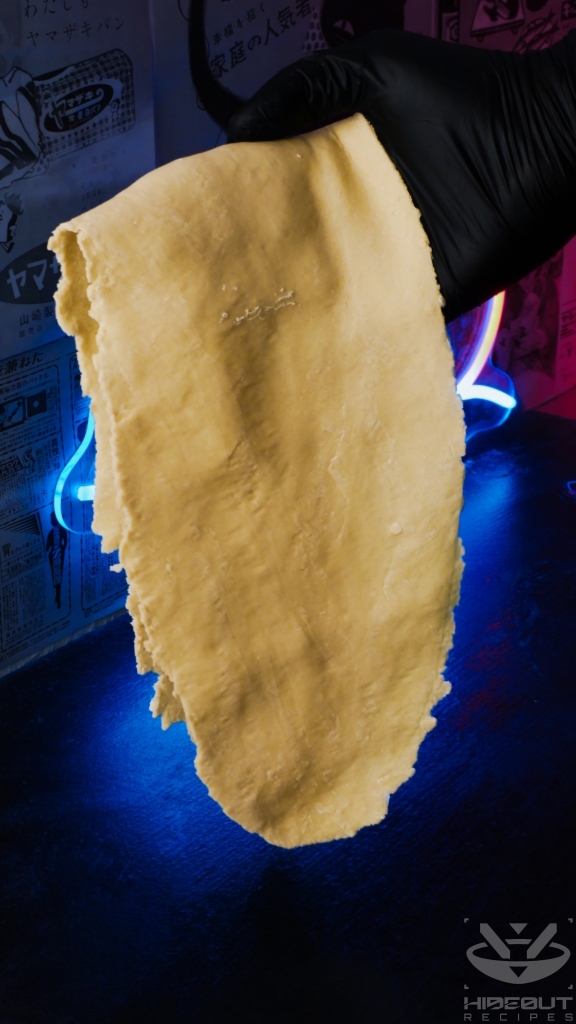
I have a decades-old, hand-cranked pasta maker at home, which I use for Italian pasta as well as ramen noodles. The sheeting rollers – I believe that’s the term – are used to flatten the dough into a sheet before they are cut into noodles. My pasta maker ranges from 1 (thickest) to 9 (thinnest), and I’ve found that 2 is ideal for ramen.
A lot of recipes call for feeding the dough sheet through the machine many times, folding it in on itself in between, in order to make the dough more uniform. While this may have some benefits, I’ve gotten away with feeding it through the thickest setting just once and then once more using the target thickness – no repeats or without even folding it over. The noodles still turned out great.
The two cutters underneath the sheeting rollers produce wider and narrower noodles, roughly corresponding to tagliatelle and spaghetti respectively. I’ve used both settings for ramen, but the spaghetti cut is more typical, and I liked the end result slightly better. The ideal cooking time for each was 2 minutes.
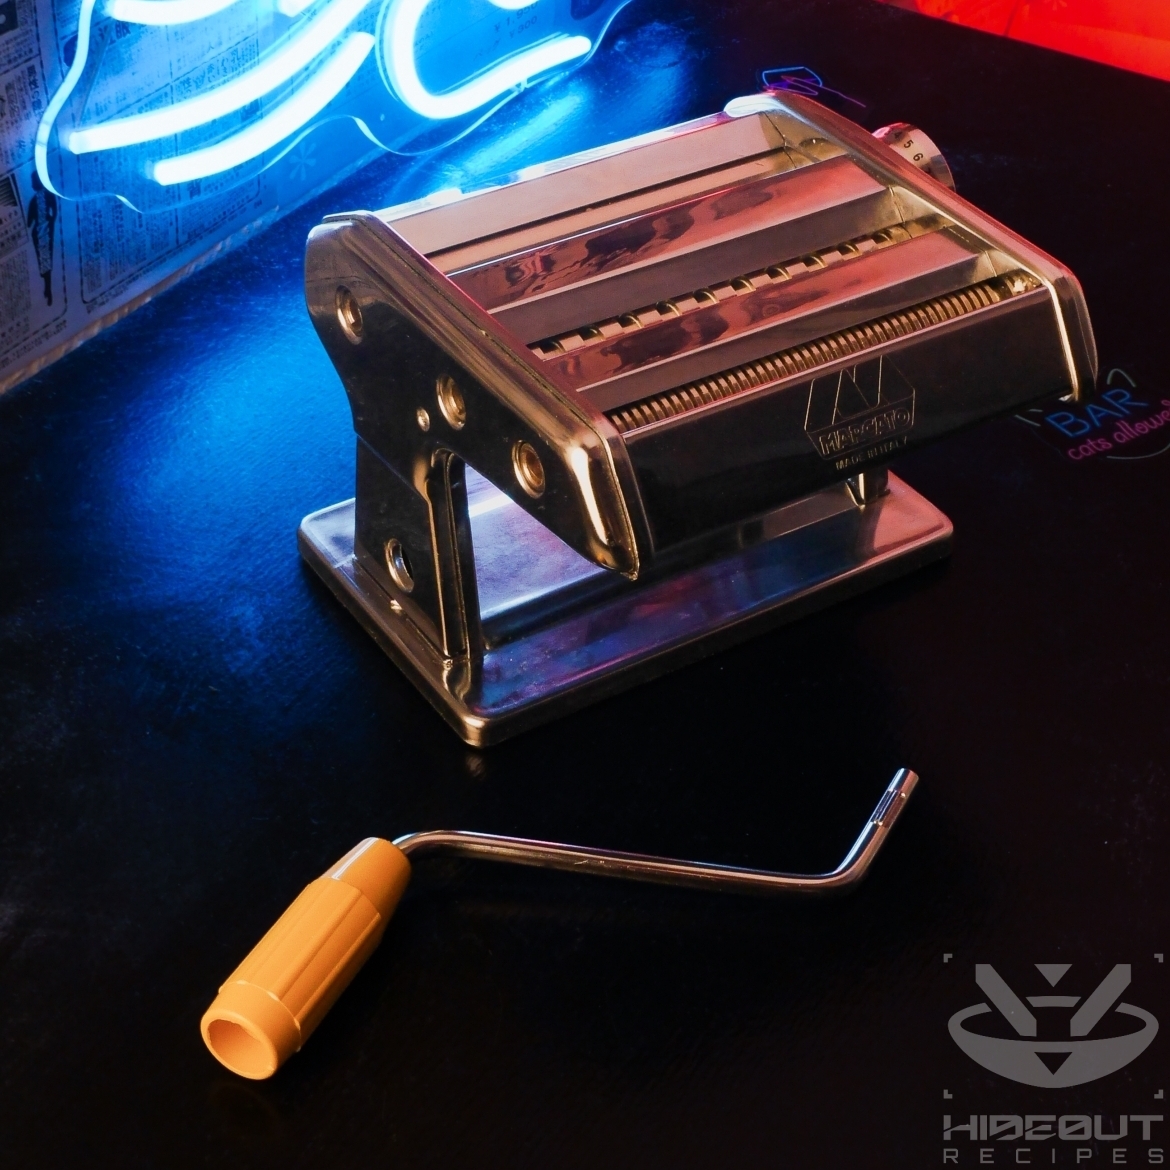
Feeding the sheet through the top while cranking the handle and catching the noodles underneath requires three hands, so I recommend getting a helper for this step. Whenever I do it alone, I place a lightly dusted plate or bowl underneath to catch the noodles for me.
Divide & flatten
You may be surprised at how dry and tough ramen dough is when you first make it, but I urge you to trust the process and avoid adding more water. Yes, it is brittle and tiring to knead, but at least it’s much less prone to sticking to itself than the wetter Italian pasta dough. If you don’t have a rolling pin, it’s an exhausting process to get the dough thin enough to feed into your pasta maker. The good news is that you can cheat a little since only the end that goes in first needs to be thin enough. If the rest is still fairly thick, you’ll have to crank the handle a little harder to squeeze it through the sheeting rollers.
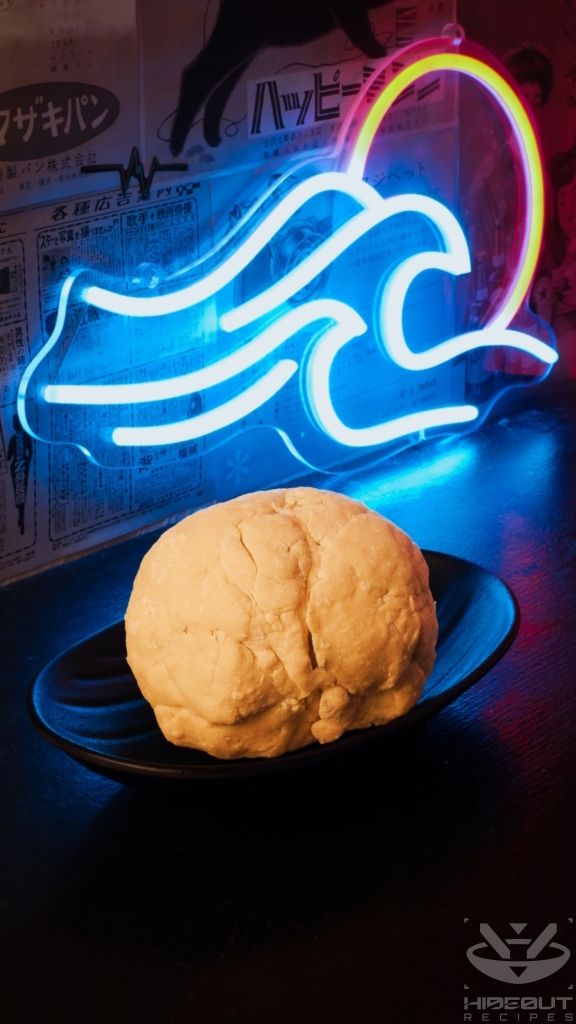
To be perfectly honest, I’ve indicated one hour of dough resting time because other recipes do. I was in a hurry once and only waited 20 minutes, which seemed to have no adverse impact on the dough. Another time I let it rest for about 90 minutes, which was just as good. If you leave it to rest for longer, make sure it doesn’t dry out by covering it with a damp cloth.
Consistency is key
Some recipes call for washing the noodles in hot water right after boiling in order to remove excess starch. You can do this if you prefer, but it’s not mandatory. I actually don’t recommend washing off the starch if you’re making Abura Soba (brothless ramen), since it mixes with the sauce and helps it stick to the noodles.
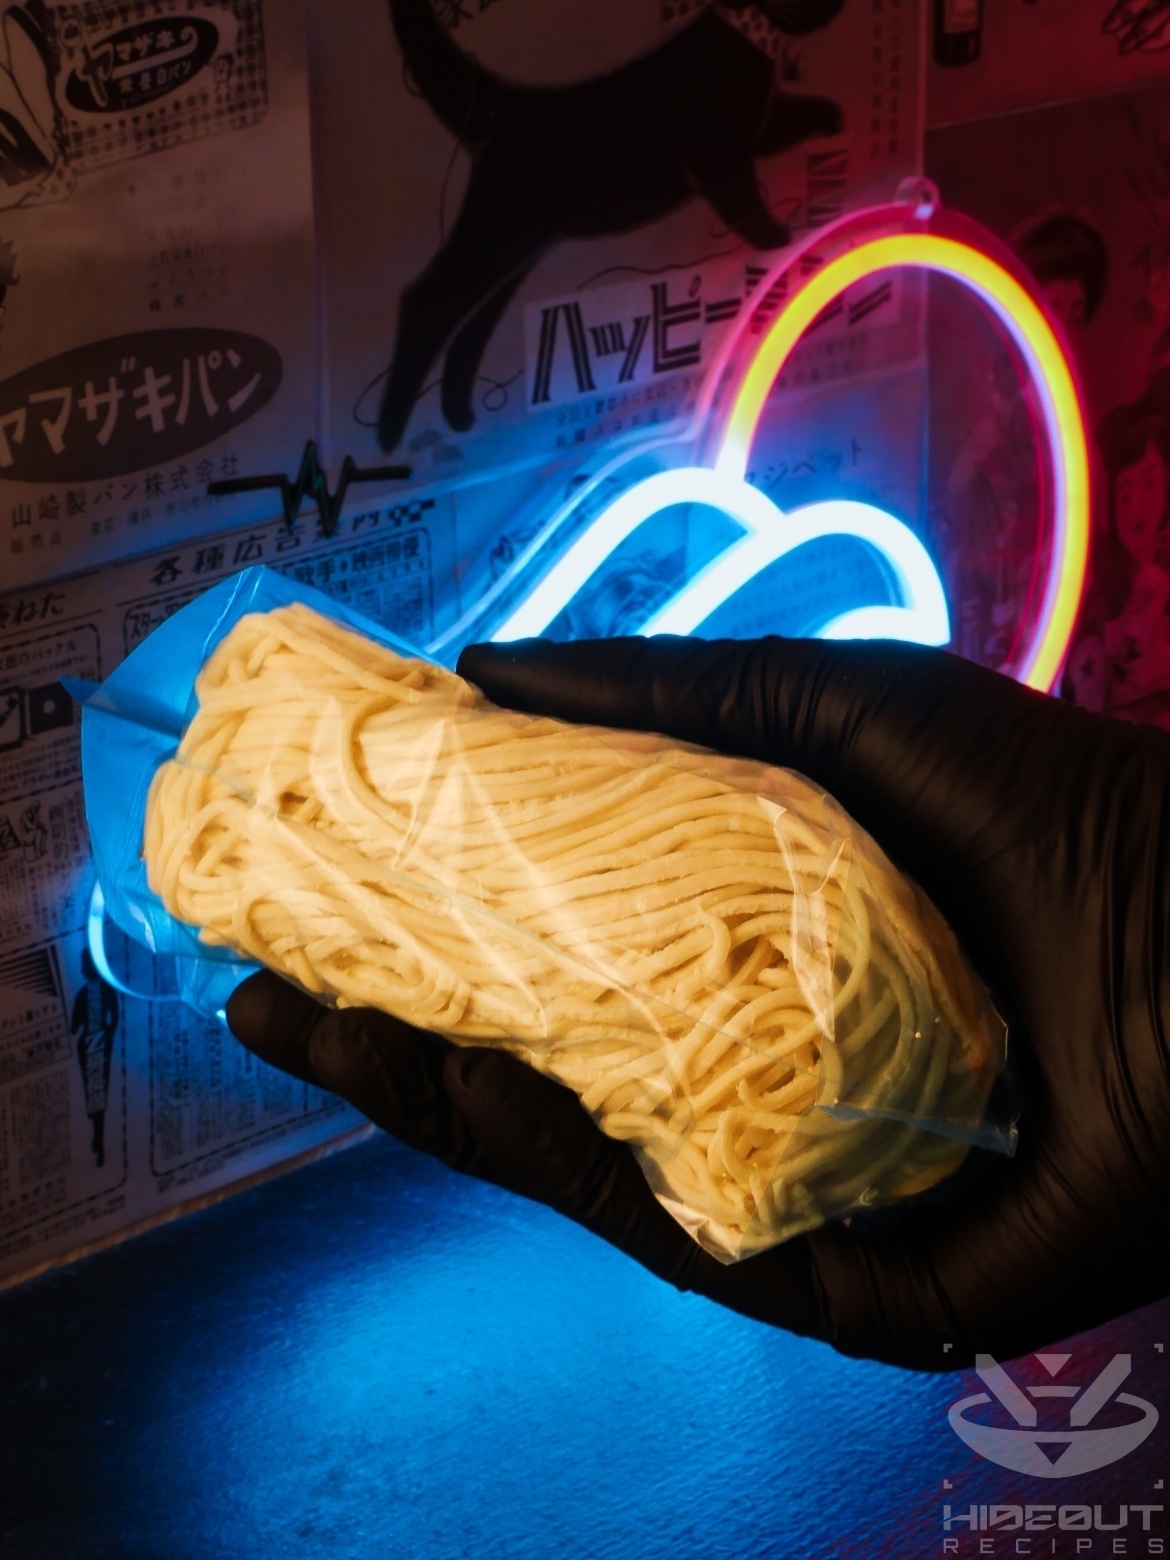
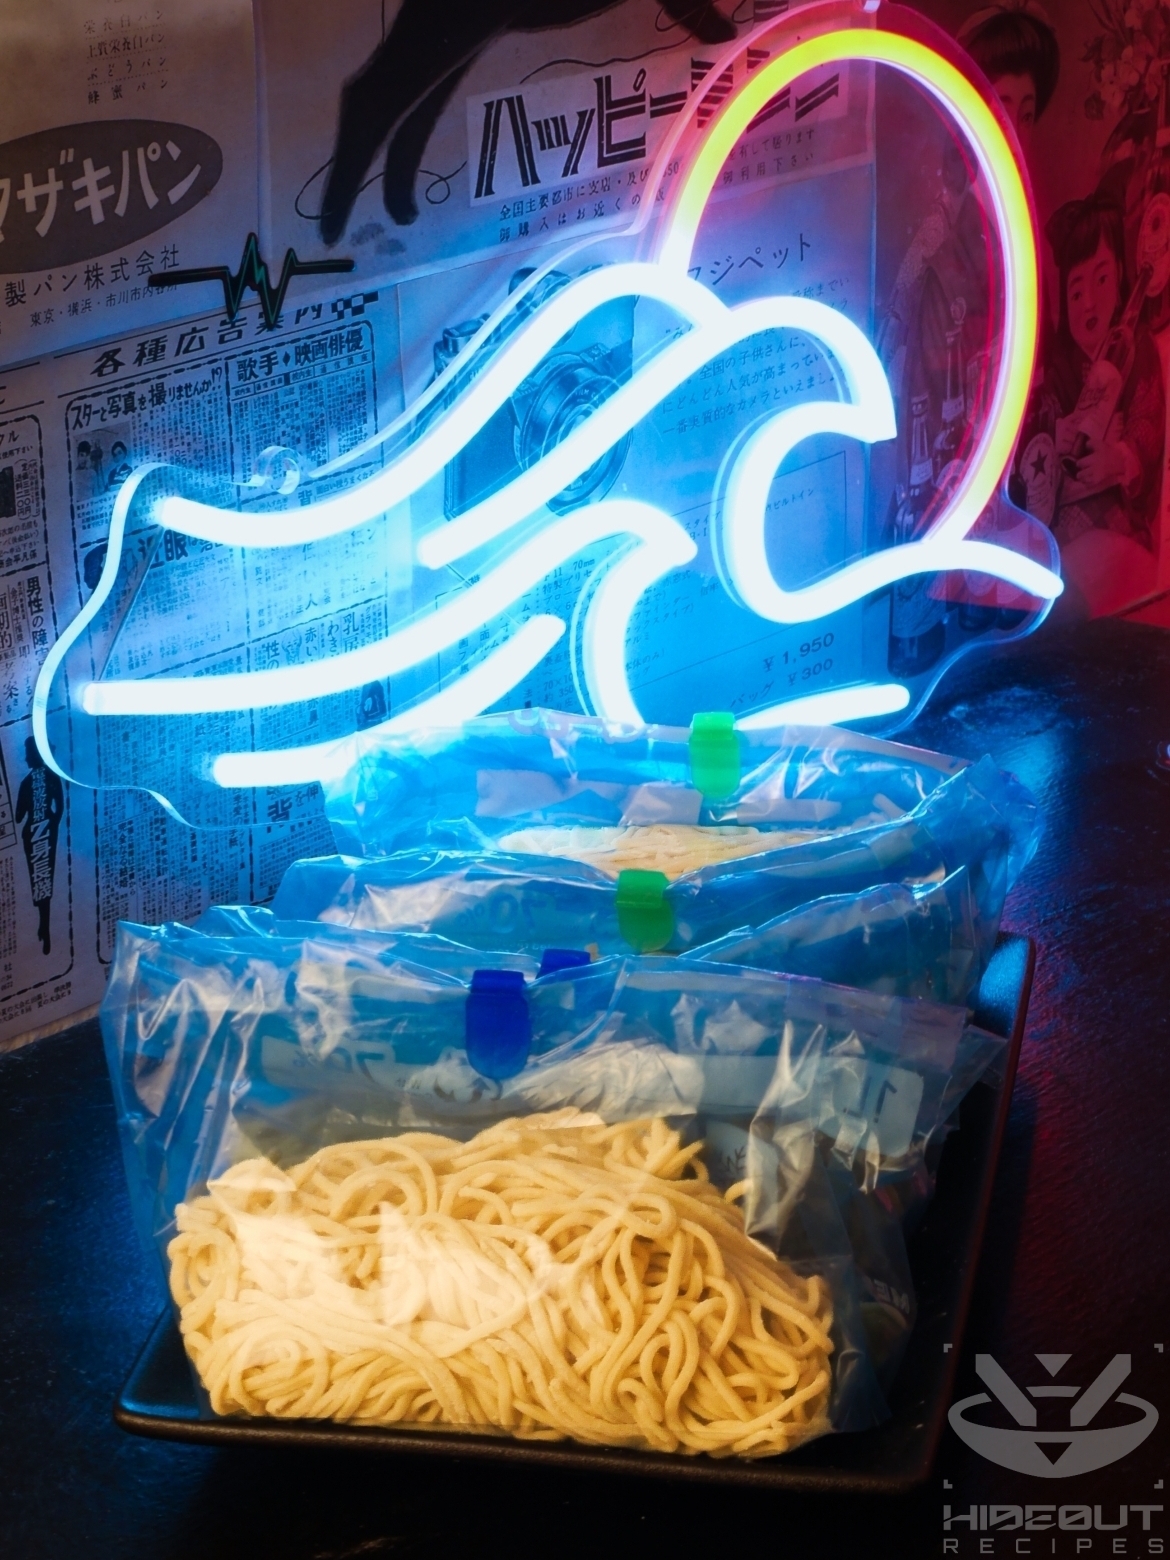
Keeping the noodles in the fridge for up to five days doesn’t seem to impact their quality much, if at all. Keep each serving in a separate bag, and make sure to dust the noodles generously beforehand so they don’t stick together. If they do once you take them out for boiling, just pull and wiggle them apart gently so they don’t clump up in the water.
Recipe credit
Like most of my recipes, I started this one out by basing it largely on an existing one, specifically the Red House Spice Alkaline Ramen Noodles recipe. I’ve since practiced it many times, made changes to the ingredients and steps (sometimes very few, sometimes many), and written up as much additional advice as I could based on my own experience.
The first time I made ramen noodles myself was at a cooking class in Tokyo’s Kappabashi street, specifically at Sobagiri Rakujyo. We cut the ramen noodles with a sobakiri cleaver, which is usually reserved for soba noodles. While those knives look really cool and are fun to handle, the pasta maker method is more consistent and convenient.
Ramen Noodles 🍜
Equipment
- 1 pasta maker with spaghetti or tagliatelle setting
- 1 Rolling Pin strongly recommended
- 1 dough cutter recommended
- 4 freezer bags or similar for storage (if needed)
Ingredients
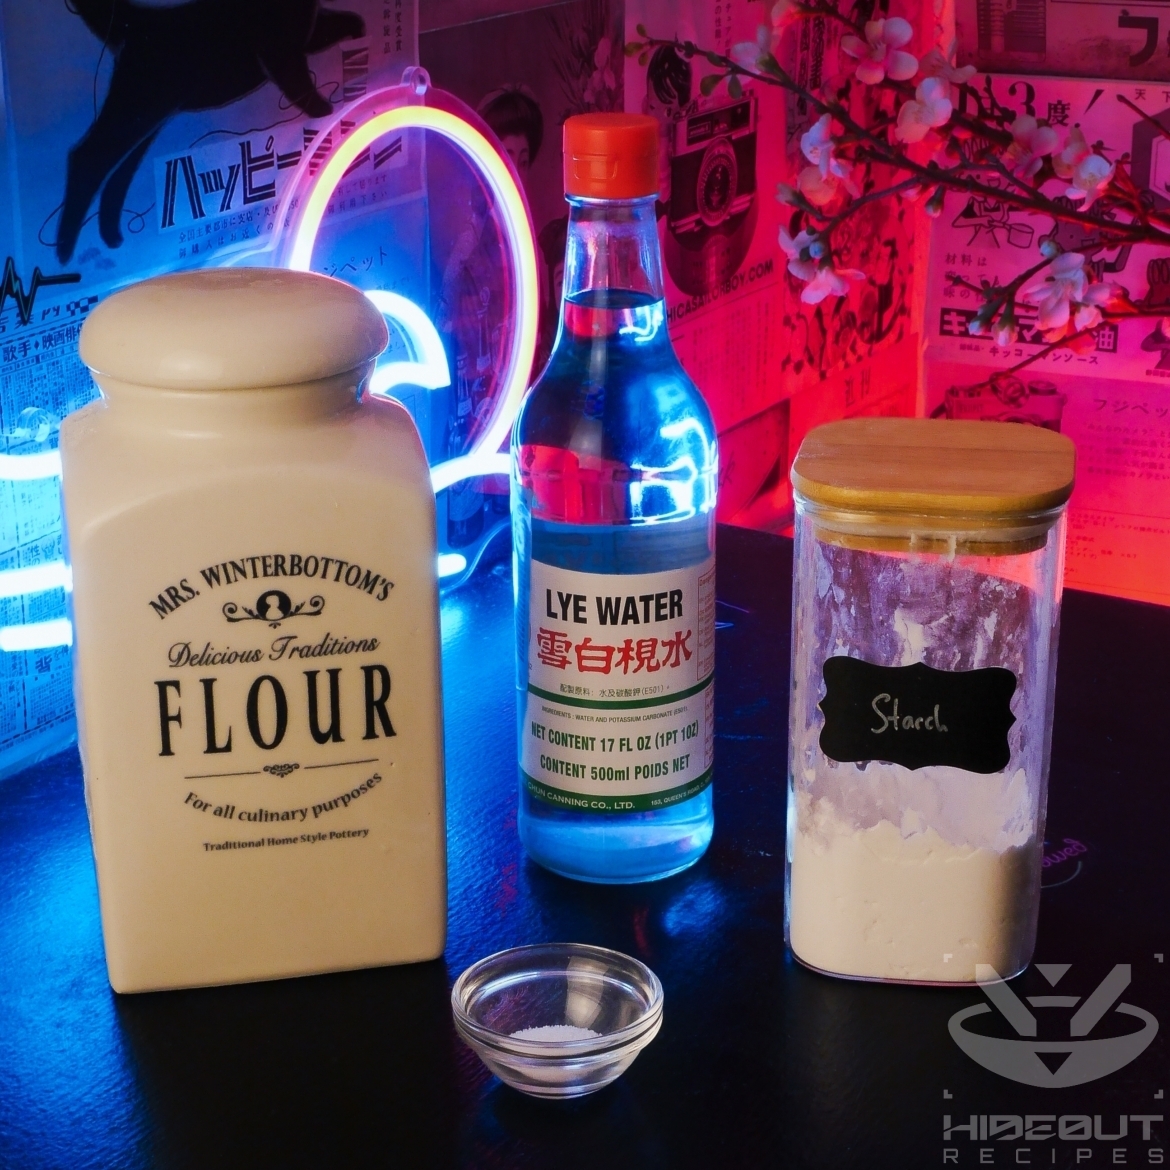
- 500 g all-purpose flour
- 0.5 tsp salt
- 210 ml water room temperature
- 1.5 tsp lye water
- some corn starch for dusting
Instructions
Make the dough
- Mix flour and salt in a mid-sized bowl.
- Mix the water and lye water in a measuring jug.
- Slowly pour the water into the bowl with flour, stirring constantly using chopsticks.
- Knead the dough until the water is evenly incorporated.Note that this dough is very dry and will not come out looking smooth. That's fine!
- Cover with a damp cloth and leave it to rest at room temperature for about an hour.
Divide, flatten, cut
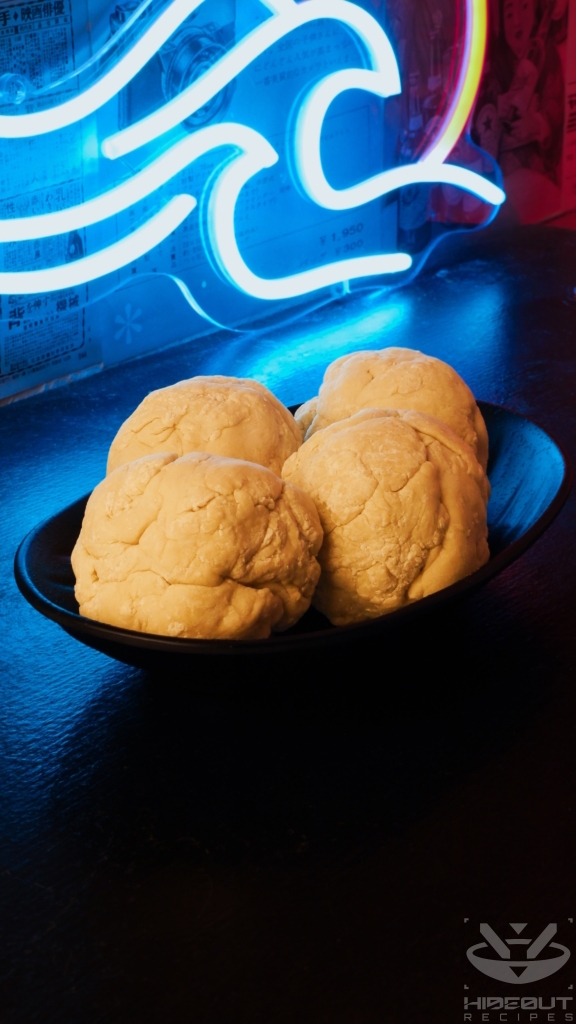
- Briefly knead again, then divide into four equal portions using a dough cutter. Each portion should come out to 175–180g.Repeat the following steps for each of them. Reference pictures above!
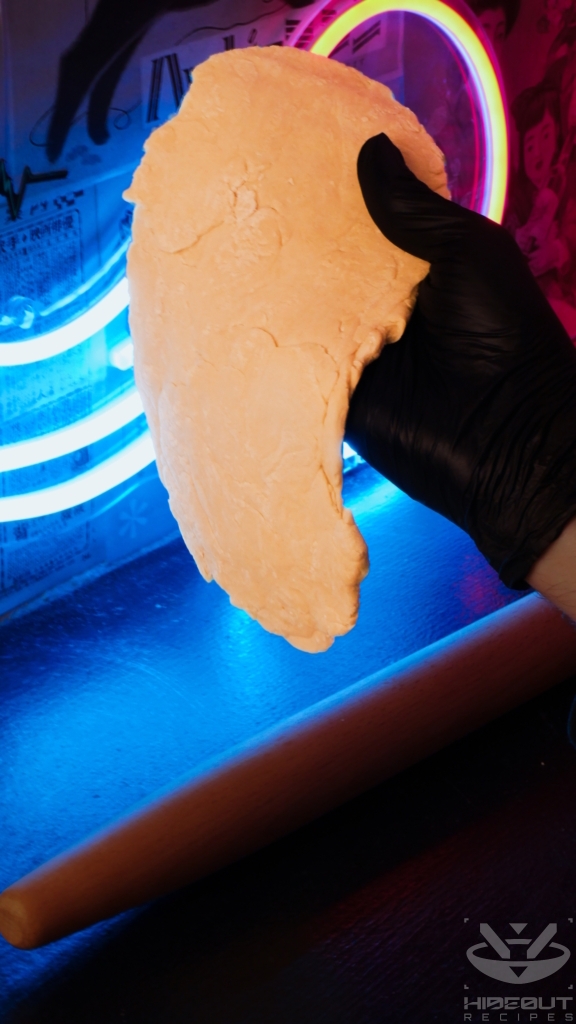
- Shape the dough into an oval so it comes out long and narrow once you flatten it.
- Using a rolling pin (recommended) or your hands, flatten it enough to fit through your pasta maker on the widest setting.
- Feed it through the pasta maker's sheeting rollers on the widest setting, then fold it over once and feed it through again.
- Decrease the thickness to your desired level and feed the dough sheet through one more time.My pasta maker ranges from 1 (thickest) to 9 (thinnest). I've found that 2 is the perfect thickness for ramen noodles.
- Lightly dust the dough sheet in corn starch.
- Feed the dough sheet through the pasta maker's spaghetti cutter. Make sure the noodles land safely underneath, or have someone help you catch them.
- If you are storing the noodles for later, dust them again with starch to prevent them from sticking together, then put in a freezer bag (or similar). Keep in the fridge uncooked for up to 5 days. When you take them out for cooking, gently untangle them again to prevent clumping up in the water.
Cook the noodles
- Bring a large pot of lightly salted water to a boil.
- Add the noodles and keep the stove on maximum heat so the water comes back to a boil quickly.
- Keep the noodles in the water for exactly two minutes, then take them out and drain well.
- Use immediately in the ramen bowl of your choice!


1 Comment
I can make my own lye water, right?
A recipe I found suggests baking some baking soda for an hour at 120°C, then mixing it with water at 1: 4